
Undoubtedly, GPT 4 is quite powerful than its predecessor. It is capable to generate more human-like responses. Even, with the help of ChatGPT, I have developed the Text To Audio Converter App. Yes, ChatGPT can act like your own personal Junior Developer. However, Smol AI takes a step further, it can create an entire codebase, once you give it the right prompt. However, for now, setting up Smol AI isn’t that easy for a normal user. But, if you want to try Smol AI now, then here’s how to set up Smol AI on Windows 11.
What is Smol AI?
It is basically an AI that writes codes for you. It is different from ChatGPT which writes small code snips. Smol AI can build out an entire codebase, even for complicated apps. Using Smol AI basically feels like having a coding team working for you, on your command.
How does Smol AI Works?
Smol AI is basically a Program written in Python Programming Language. And, you need to attach Open AI API key to the program. Because it uses ChatGPT to get answers.
First Smol AI passes product requirements into a prompt. So that, it can generate the architecture of the Apps. This means, what different files it needs to generate for the App. After that, it passes the list of files with the original product requirement to another prompt. That will generate a list of dependencies.
So that, GPT can understand what are the different functions and variables in different files. In the end, it runs a for loop, where it passes on both product requirements architecture and the dependencies to a new prompt. That will write the code for each individual file.
As per my understanding, Smol AI eliminates the need of asking multiple questions to ChatGPT manually. Yes, as of now Smol AI is quite buggy. This means modification in code still requires a Coder.
Create a new OpenAI API Key
The application Programming Interface is known as API. It allows the communication of two applications to each other. And, to use ChatGPT in Smol AI, you need to generate an OpenAI API Key.
- Open the following Open AI Platform Site in your web browser.
- After that, signup or log in using your Google Account.
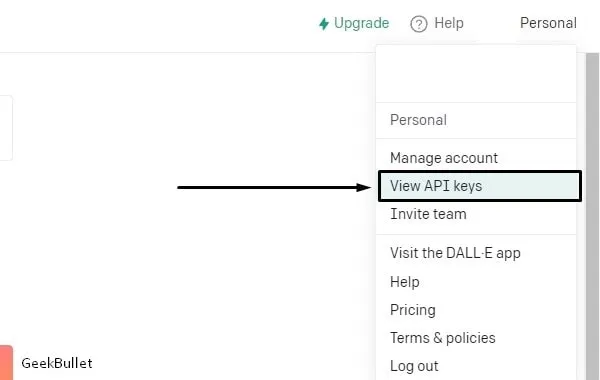
- Once logged in, click on Personal > View API Keys.
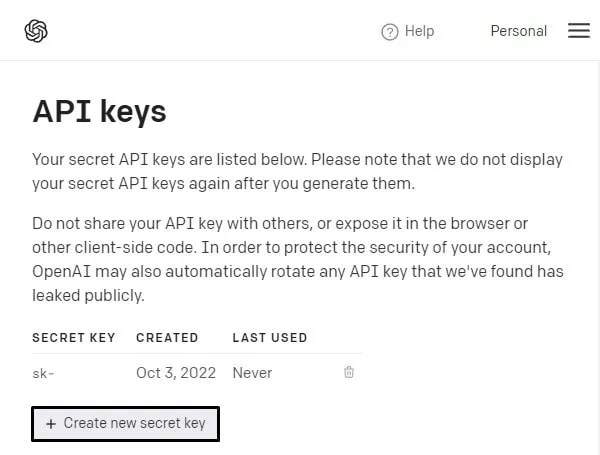
- Click on “Create New Secret Key”.
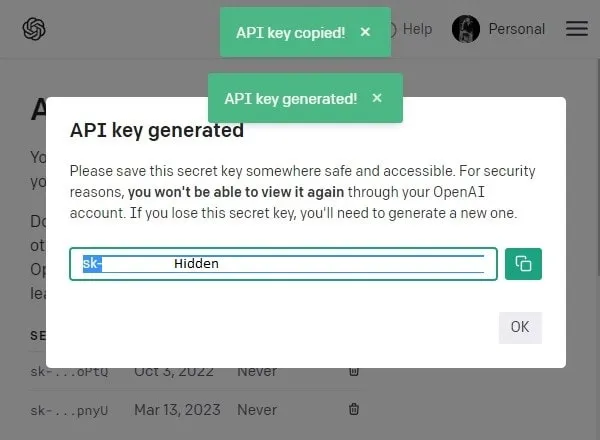
- You can enter the name of the API Key for reference. It’s optional. Click on Create Secret Key.
- That’s it, OpenAI will generate a new API Key for you. Do copy the API Key. Because you can view the API key at once only. So paste it somewhere safe in Notepad.
Set Up Smol AI on Windows 11 Computer.
- First, make sure Visual Studio Code and Python are installed on your Computer. If not then do download both setup and perform installation.
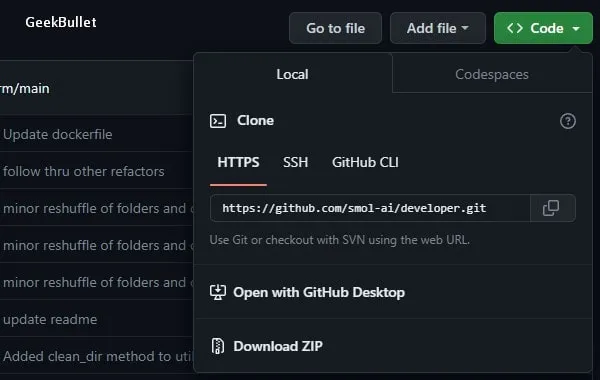
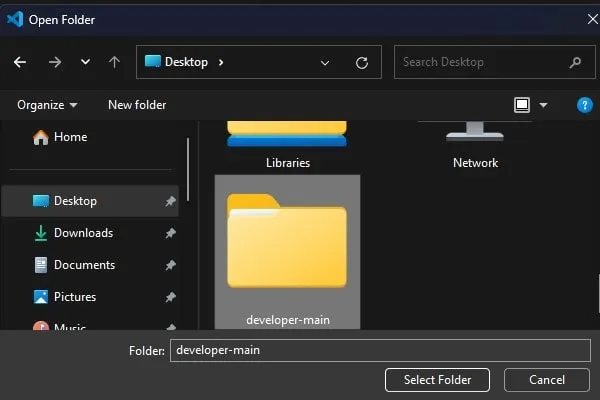
- Now, do download Zip File on Smol AI from GitHub. Click on Code > Download Zip.
- Once, the developer-main zip file gets downloaded. Do Right-click on it and then click on Extract All > Extract.
- Now, open Visual Studio Code, and make sure Python is installed properly. From the left side, click on “Open Folder”.
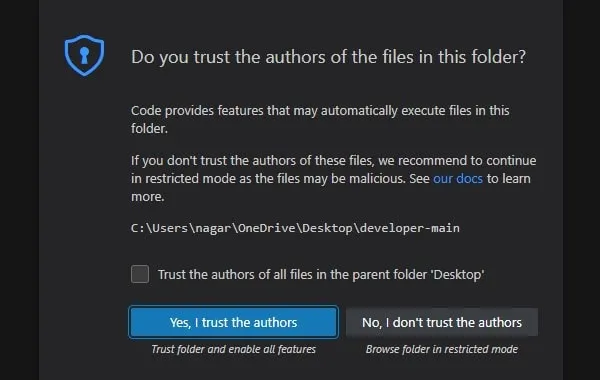
- Select the “developer-main” folder, and click on “Select Folder”. (If there is another folder with the same name inside the “
developer-main” folder. Then, do select that one. Else, you will get errors later in the Terminal.)
- Click on the “Yes, I trust the authors” option.
- Now, In the Visual Studio Code Explorer section, you will find the “
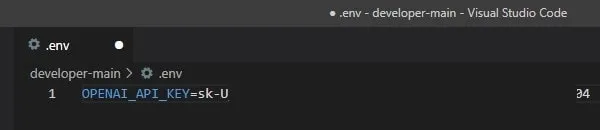
.example.env” file. Do Right-click on it and then click on Rename. Do remove “.example” from the name, and keep it “.env“.
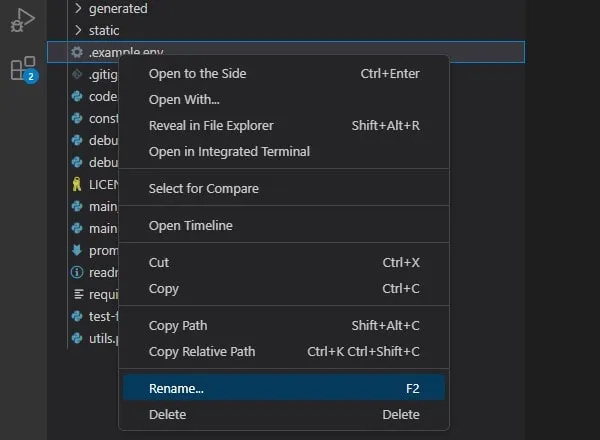
- Now, select “
.env” file and enter your Open AI API Key, by replacing the example API Key.
Install Smol AI Dependencies.
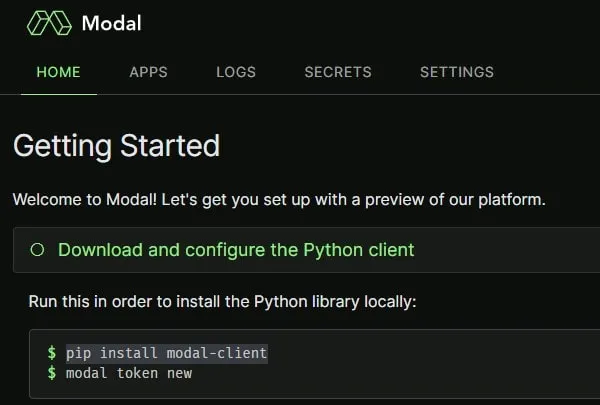
- Go to the Modal website and do SignUp using your GitHub Account.

- Once, you complete the signup process, it will show you commands to configure the Python Client.
- Go back to Visual Studio Code, and, from the left pane, do select the “
main.py” file.
- After that, Click on Terminal > New Terminal.
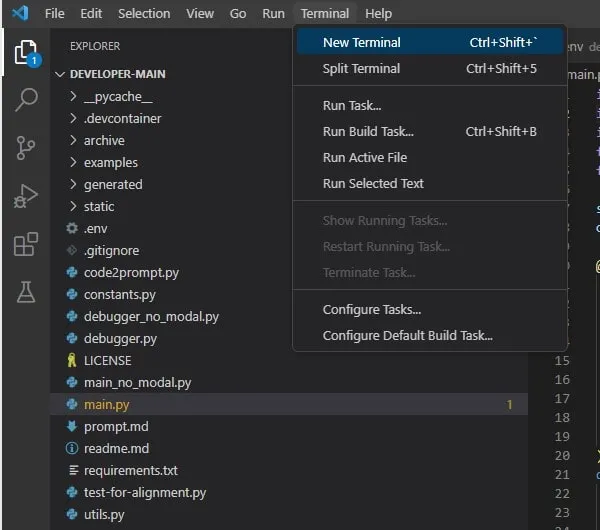
- Once the Terminal gets open at the bottom of the screen. Run the following Command.
pip install modal-client
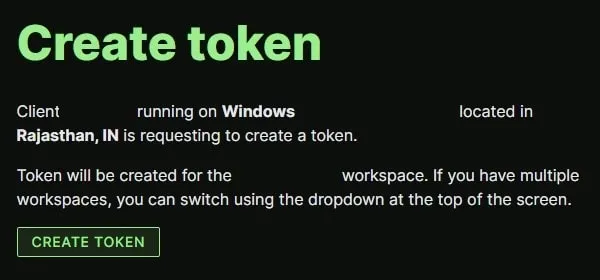
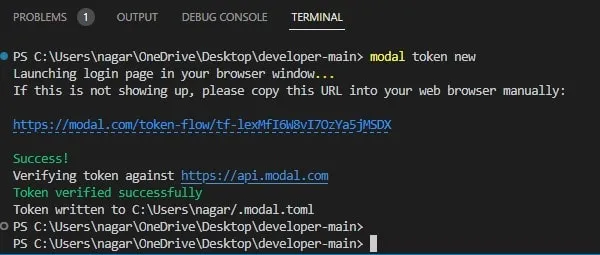
- After that, run the new command to create a token for the Modal.
modal token new
- Once, you run the command it will take your default browser to create a token. Click on Create Token.
- Once, the Token gets successfully created. You will see the Token Verified Sucessfully message in the Terminal.
- That’s it, now you can use Smol AI by running the following prompt. It’s an example, replace text inside the double quote and write your own prompt.
modal run main.py --prompt "a Chrome extension that, when clicked, opens a small window with a page where you can enter a prompt for reading the currently open page and generating some response from openai" --model=gpt-4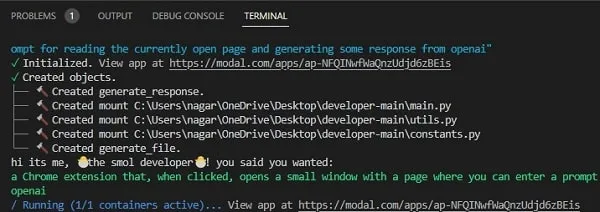
- By default, it runs on
gpt-3.5-turbo. But, if you have tokens for the GPT-4. Then, you can add “--model=gpt-4” in the above command to use it.
Note: If you get the “You exceeded your current quote, please check your plans and billing details” error in Terminal. Then, make sure you have enough credits left in your account.

So, that’s how you can set up Smol AI on your Windows PC. Yes, you can follow the same steps to setup it on Mac as well. Because Visual Studio Code is available for macOS as well.